Quickstart: Upload Data
This tutorial will walk you through how to load data into the admin panel, then use the data for a dashboard or API.
Make an account on our demo server or run Matico locally (see environment setup)
- Click the blue Login / SignUp button
- Create an account
- Log in, and navigate to the Datasets page
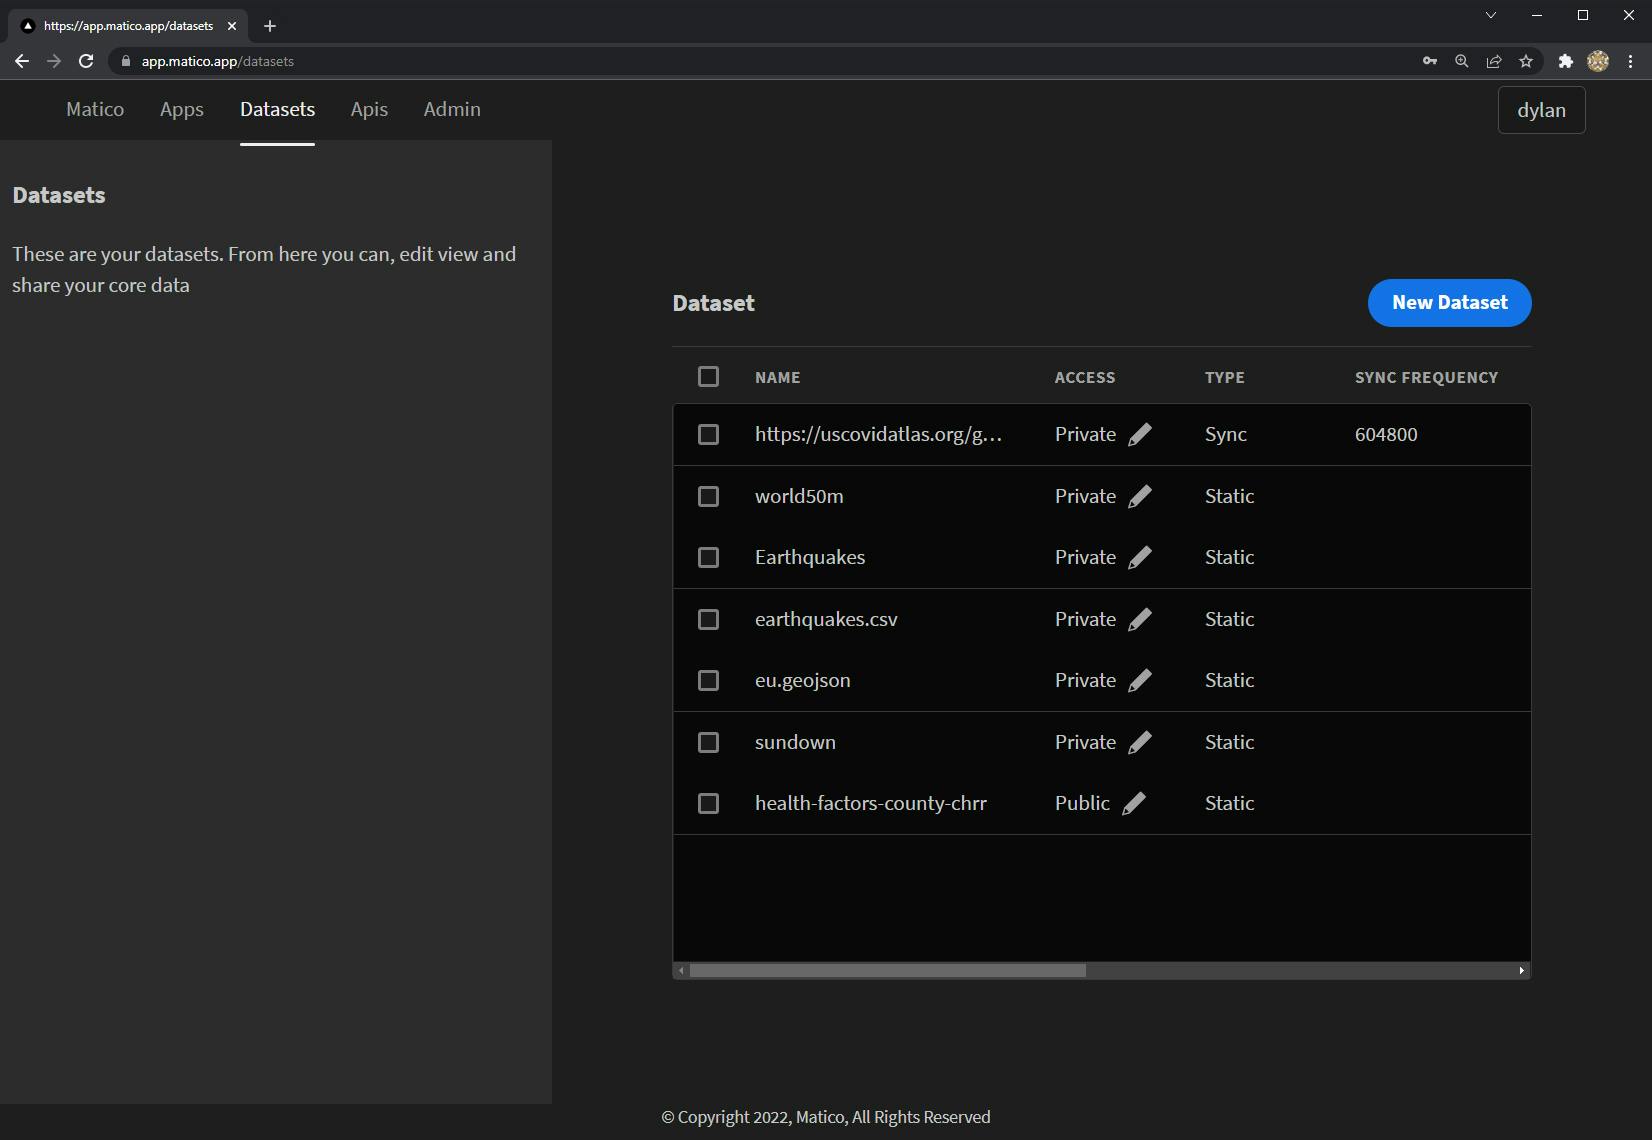
- On this page, your existing datasets will populate rows in the table, with information on the access type (public or private), the dataset type (externally syncing or static), and other relevant information.
Add a new dataset using the New Dataset button.
- To upload a local file, drag a file from your file browser and click on the icon to browse for a file. Currently, only CSV files (with lat/lon fields) and GeoJson files (in WGS84 projection) are supported.
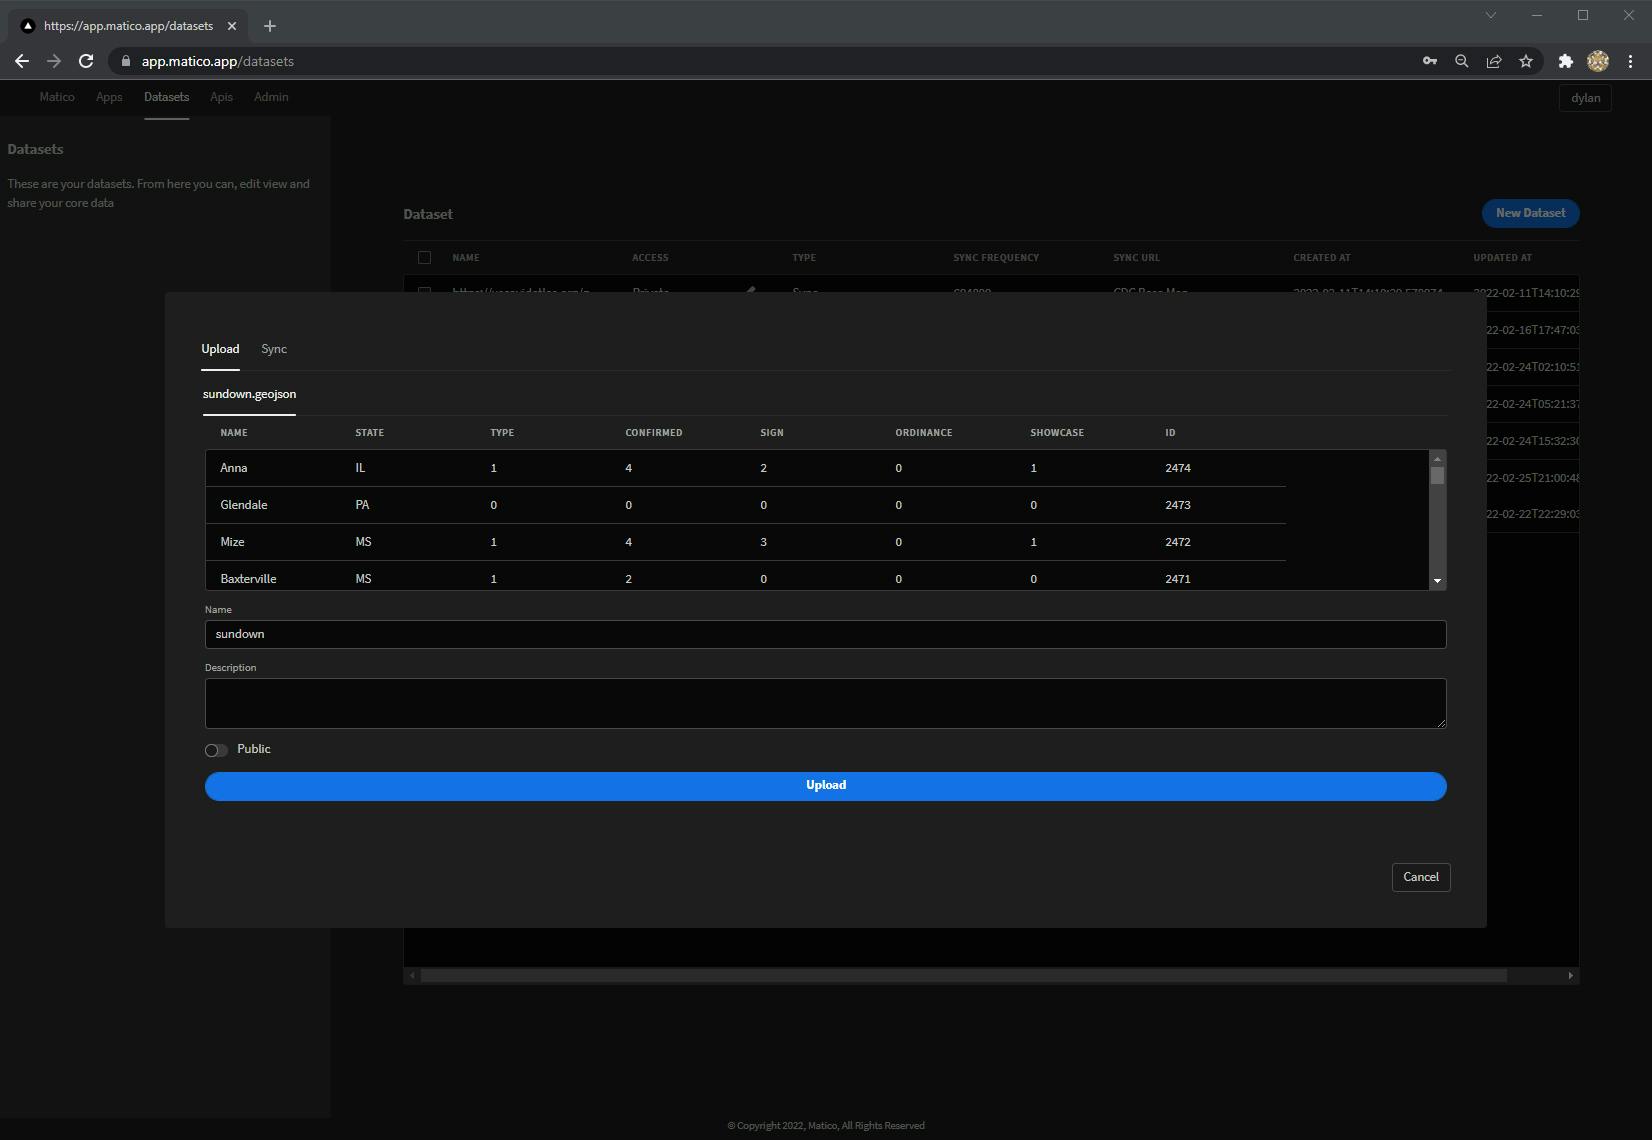
- After loading a file into the interface, you'll see a preview of the data and text fields to name your dataset and add a description. You can also choose whether to make your data public or private. If you want to use this dataset on a public dashboard, make it public.
- For CSV datasets, you'll additionally need to select an X (longitude) and Y (latitude) column.
- Click the Upload button to transfer your data to the Matico server. After the upload reaches 100% completion, you can safely close the uploader window. It will still say cancel - this is a bug.
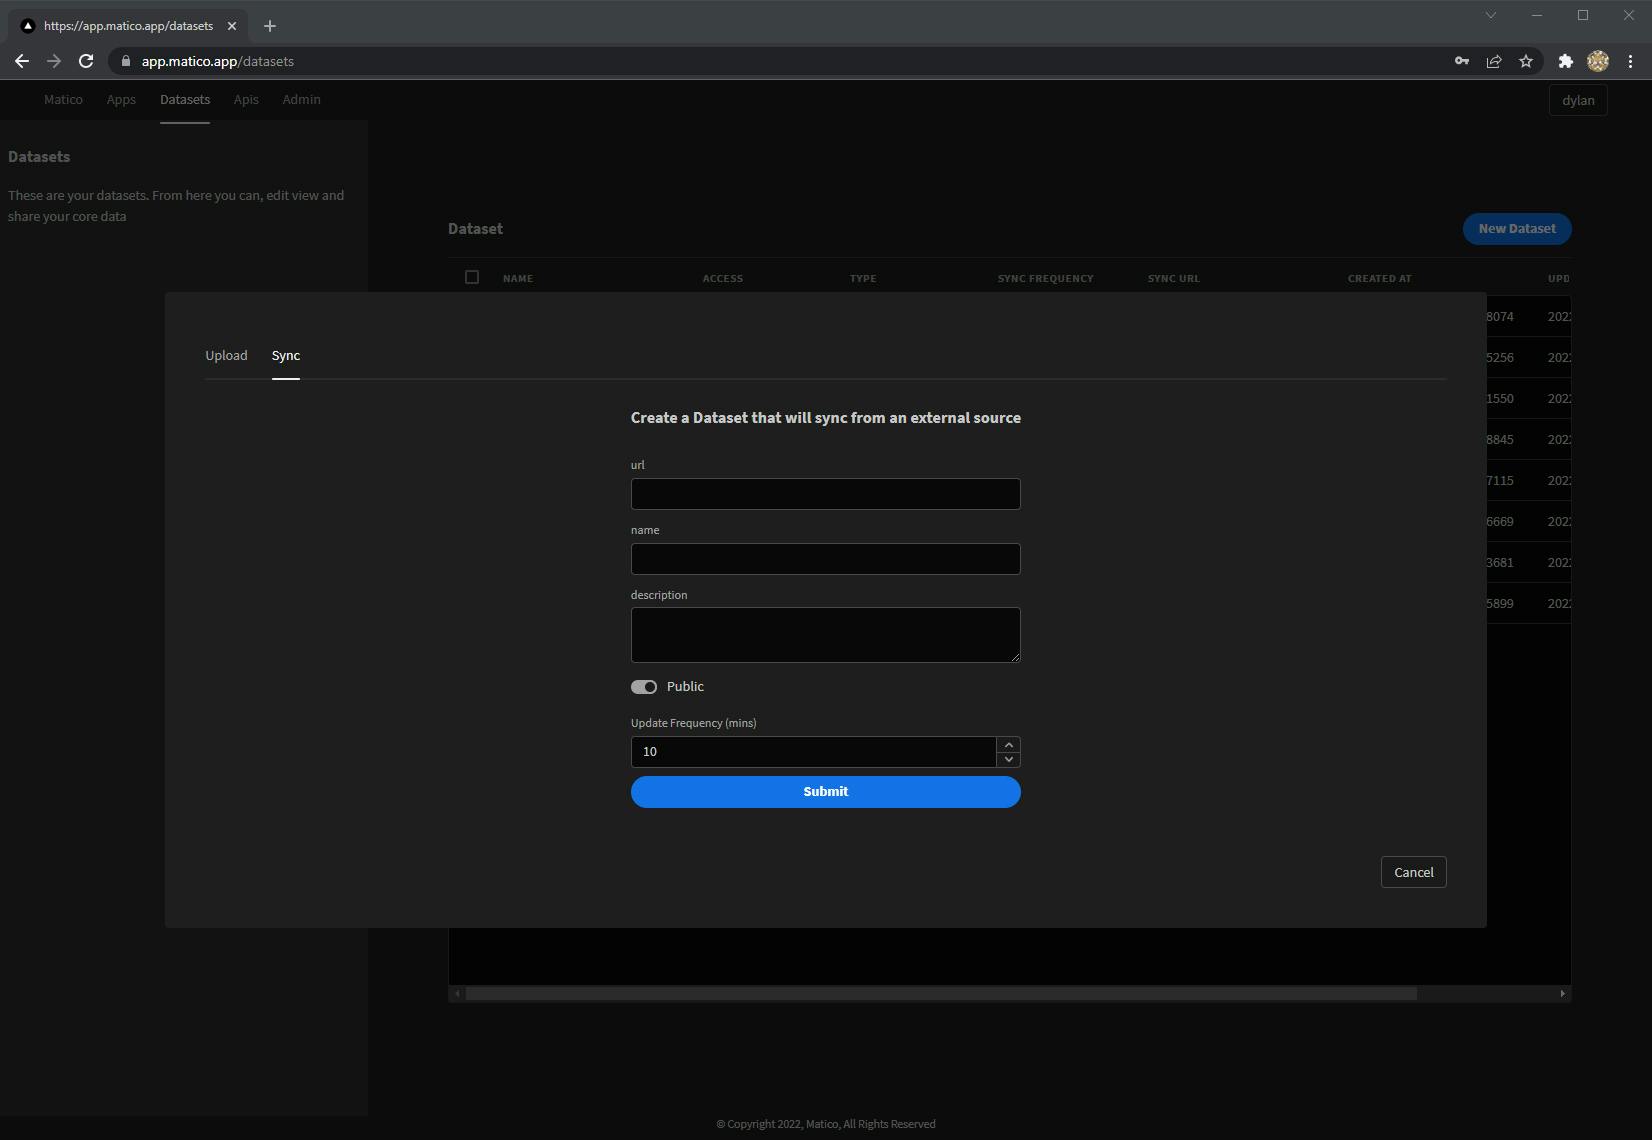
You can also connect to a remote dataset that may update over time, such as Socrata or a third-party API.
- You can use the Sync tab on the data uploader and choose a URL, name, description, and update frequency.
- The sync frequency is in minutes, so 1440 is daily and 10080 is weekly.
- Click submit, and your dataset will automatically attempt to sync.
Now that's what I call data
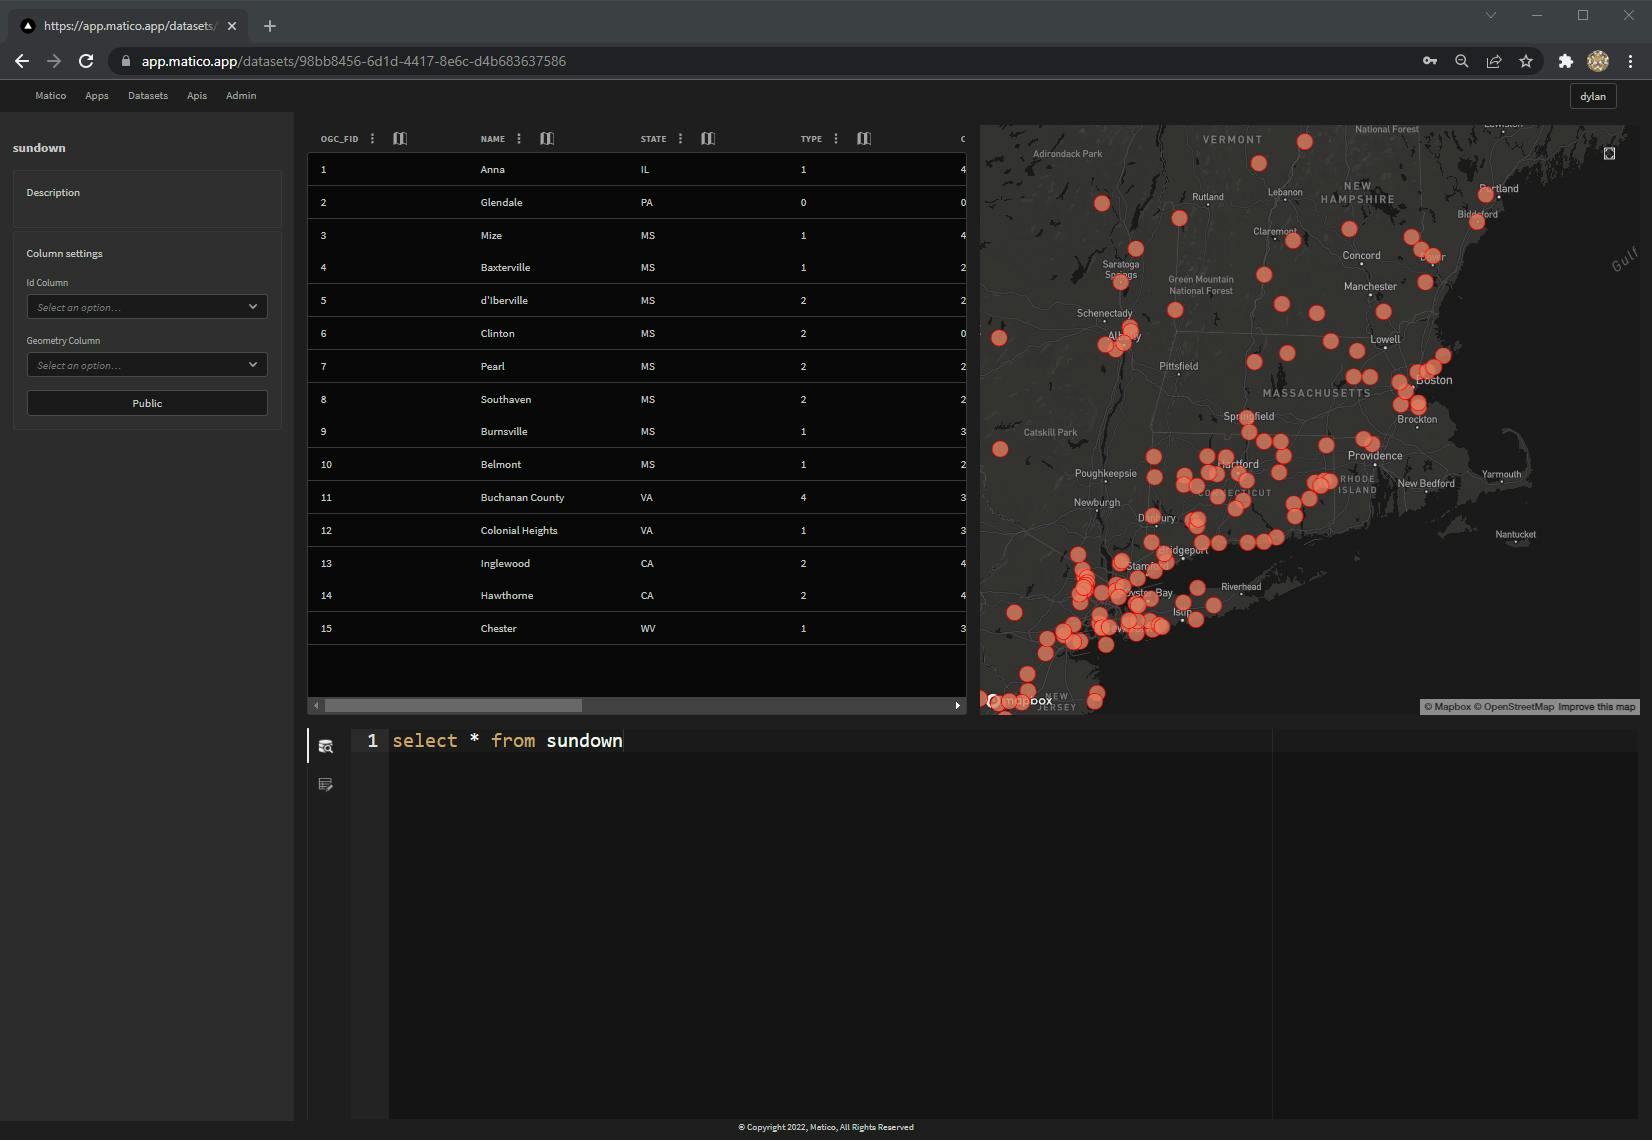
- After uploading or syncing a dataset, you should see it appear in the table!
- To edit or view a dataset, click on the name of the dataset in the table
- On this page you can...
- Preview the data table for the dataset
- See the data on a map in the top right panel
- Perform SQL queries on the dataset with the bottom panel
- Inspect individual elements
- Edit geospatial data properties or geographies
- Visualize properties on the map
- Most importantly, now that you have a dataset, you can use it in your apps and APIs
Using a dataset in an API
- Click on APIs in the top nav bar, then click New API
- Name and add a description for your API
- You can add a standard SQL query in the bottom left panel to choose which table(s) to query. The tables are generated from the names of the datasets you previously uploaded

- By adding text in curly brackets with a $ prefix, like
${myVariable}, you can add variables to your API query - In the left panel, there are two API endpoints that provide a geojson data output, or a Mapbox Vector Tile output with a query parameter for your variable(s), such as
income=45000as shown - You can create a endpoint query with multiple variables, complex SQL, PostGIS and other Postgres extensions (if installed on your database), and more.
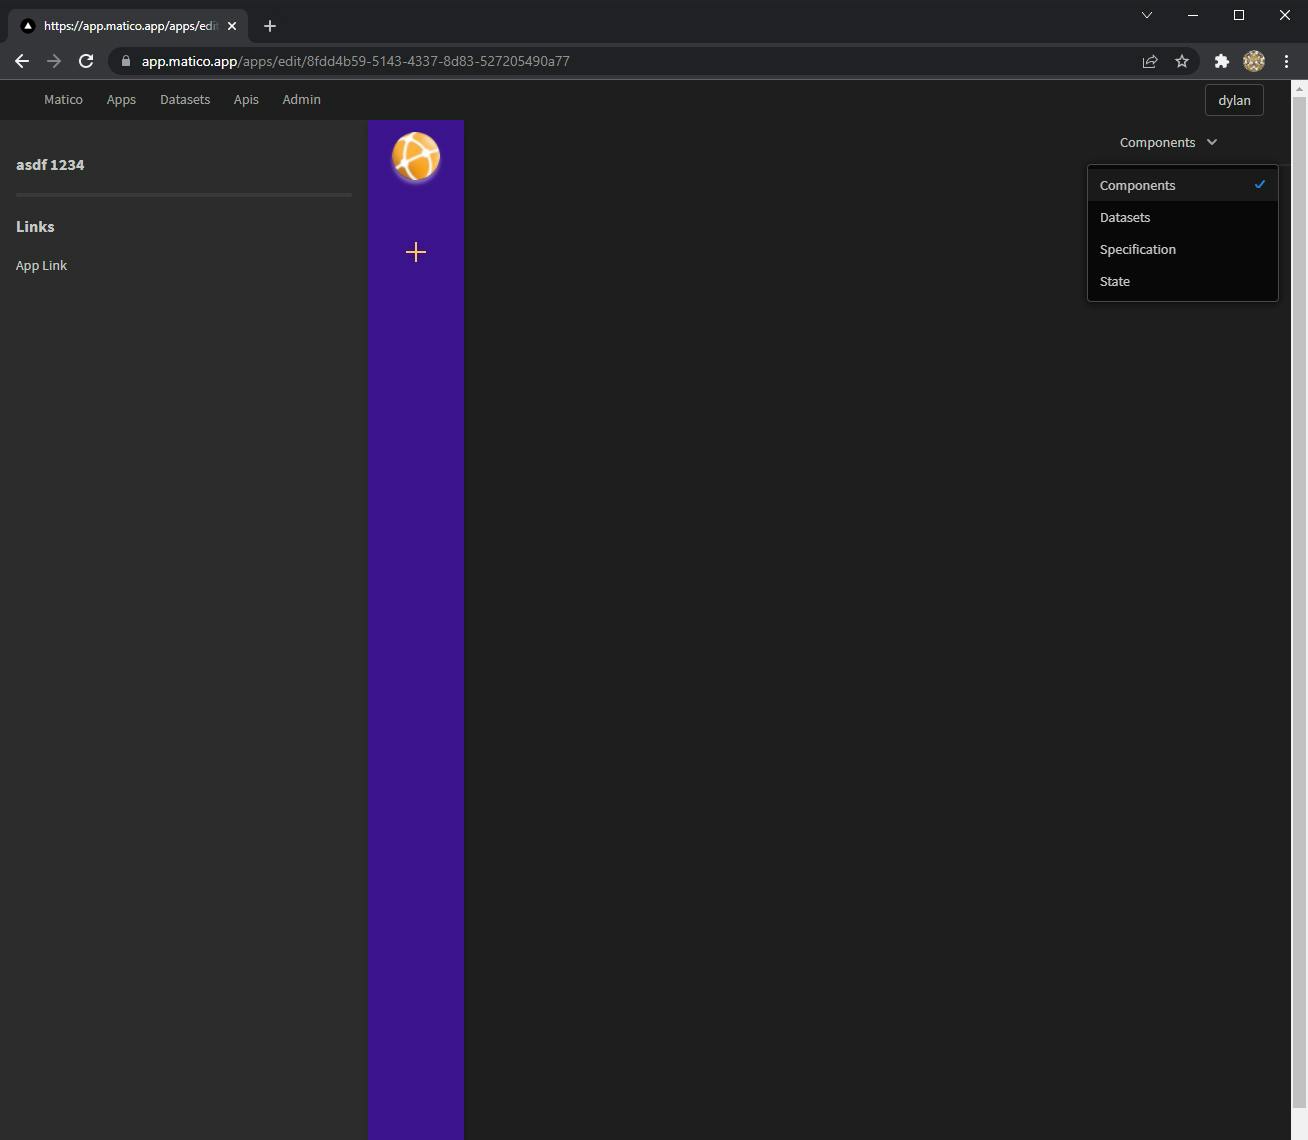
Using a dataset in an app
- Similar to datasets or APIs, go to the Apps page and make a new app
- You can access any of your public datasets through the Datasets -> Matico Datasets menu in the top right of the editor
- Choose the dataset you want to use, and choose
Remotefor a connection to the database, or local for the full data to be loaded- For large datasets (more than a few thousand features, or dense properties of data) we recommend using the remote option. The data will be broken up into tiles instead of loaded all at once
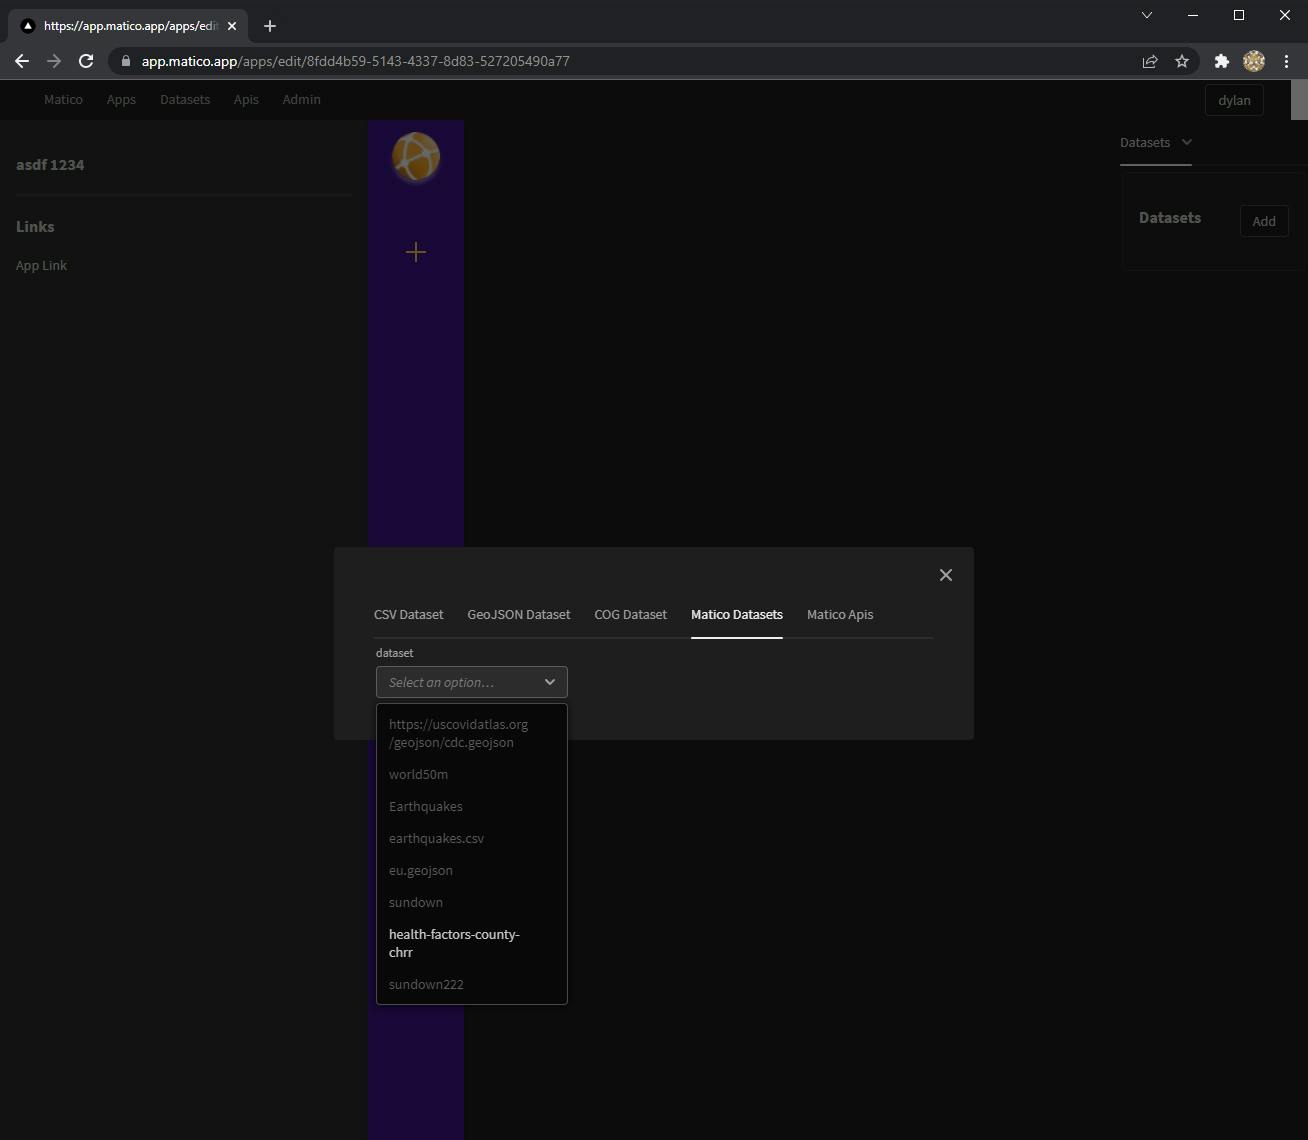
- From this menu, you can also connect other remote CSV or GeoJson datasets, Matico APIs, or other external datasets, such as Cloud Optimized GeoTiffs
Next, explore building a dashboard with Matico.